Fine-tune Meta Llama-3.2-3B-Instruct
Apply fine-tuning to the Meta* Llama3.2-3B Instruct model, using Low-Rank Adaptation (LoRA) with an Optimum Habana container workflow. Using a lightweight model, with gated access, explore the model’s capabilities for translation and accuracy.
- 1. Choose model and processor
- 2. Configure environment
- 3. Launch instance
- 4. Prepare and load data
- 5. Train and evaluate model
- 6. Deploy
- 7. Monitor and optimize
Tip
A pre-trained model is used for demonstration. The model is fine-tuned using a causal language modeling (CLM) loss. See Casual language modeling from Hugging Face.
Prerequisites
Complete Get Started
HuggingFace account
Agree to Terms of Use of the LLama 3.2-3B model
Create a read token and request access to the Meta Llama 3.2-3B model
Request Access to Llama3.2-3B-Instruct Model
Log into your HuggingFace account.
Navigate to the Llama3.2-3B Instruct model page.
Note
This tutorial is validated on Llama3.2-3B Instruct using a token method for a gated model. See also Hugging Face Serving Private & Gated Models.
View the Model card tab.
Complete a request to access to the Llama3.2-3B-Instruct Model.
In your Hugging Face account, review Settings to confirm your request is Accepted.
Compute Instance
Instance Type |
Recommended Processor |
Cards |
RAM |
Disk |
|---|---|---|---|---|
Bare Metal (BM) |
Intel® Gaudi® 2 processor |
8 Gaudi 2 HL-225H mezzanine cards with 3rd Gen Intel Xeon® processors |
1TB |
30TB |
Log in and Launch Instance
Visit the Intel® Tiber™ AI Cloud console home page.
Log into your account.
Click the Hardware Catalog from the menu at left.
Select the instance type: Gaudi2 Deep Learning Server.
Complete Instance configuration. See Compute Instance details.
Instance type. See Compute Instance above.
Machine image. See Compute Instance above.
Add Instance name and Public Keys.
Click Launch to launch your instance.
Tip
See also Manage Instance.
Run Habana container workflow
After launching a bare metal instance, run the container workflow.
Launch your instance in a command line interface (CLI).
Visit Habana Prebuilt Containers, and copy and run the latest commands:
Pull Docker image
Run Docker image
Pull the latest
gaudi-dockerimage. Example code is shown below.docker pull vault.habana.ai/gaudi-docker/1.18.0/ubuntu22.04/habanalabs/pytorch-installer-2.4.0:latest
Run the habana docker image in interactive mode. See example below.
docker run -it \
--runtime=habana \
-e HABANA_VISIBLE_DEVICES=all \
-e OMPI_MCA_btl_vader_single_copy_mechanism=none \
-v /opt/datasets:/datasets \
--cap-add=sys_nice \
--net=host \
--ipc=host vault.habana.ai/gaudi-docker/1.18.0/ubuntu22.04/habanalabs/pytorch-installer-2.4.0:latest
Run the following lines, one code block at a time.
git clone https://github.com/huggingface/optimum-habana.git
cd optimum-habana && python3 setup.py install
cd examples/language-modeling && pip install -r requirements.txt
Continue below.
Export Hugging Face Token
You must get a Hugging Face token for gated model access. This tutorial uses a command line interface (CLI) method. You are still working in the container, continued from above.
Follow steps in Hugging Face Serving Private & Gated Models.
In your CLI, export token as an environment variable like shown below.
Paste in your own token, replacing “Your_Huggingface_Token”.
export HF_TOKEN="Your_Huggingface_Token"
Optional: Show token to confirm that the variable is set.
echo $HF_TOKEN
Apply Single-card Finetuning
The dataset is taken from Stanford Alpaca repo. Note the flagged commands below.
Run single-card fine-tuning of Meta-Llama-3.2-3B-Instruct.
python3 run_lora_clm.py \
--model_name_or_path meta-llama/Llama-3.2-3B-Instruct \
--dataset_name tatsu-lab/alpaca \
--bf16 True \
--output_dir ./model_lora_llama \
--num_train_epochs 3 \
--per_device_train_batch_size 16 \
--evaluation_strategy "no" \
--save_strategy "no" \
--learning_rate 1e-4 \
--warmup_ratio  0.03 \
--lr_scheduler_type "constant" \
--max_grad_norm  0.3 \
--logging_steps 1 \
--do_train \
--do_eval \
--use_habana \
--use_lazy_mode \
--throughput_warmup_steps 3 \
--lora_rank=8 \
--lora_alpha=16 \
--lora_dropout=0.05 \
--lora_target_modules "q_proj" "v_proj" \
--dataset_concatenation \
--max_seq_length 512 \
--low_cpu_mem_usage True \
--validation_split_percentage 4 \
--adam_epsilon 1e-08
Tip
This may take some time. Your results may differ.
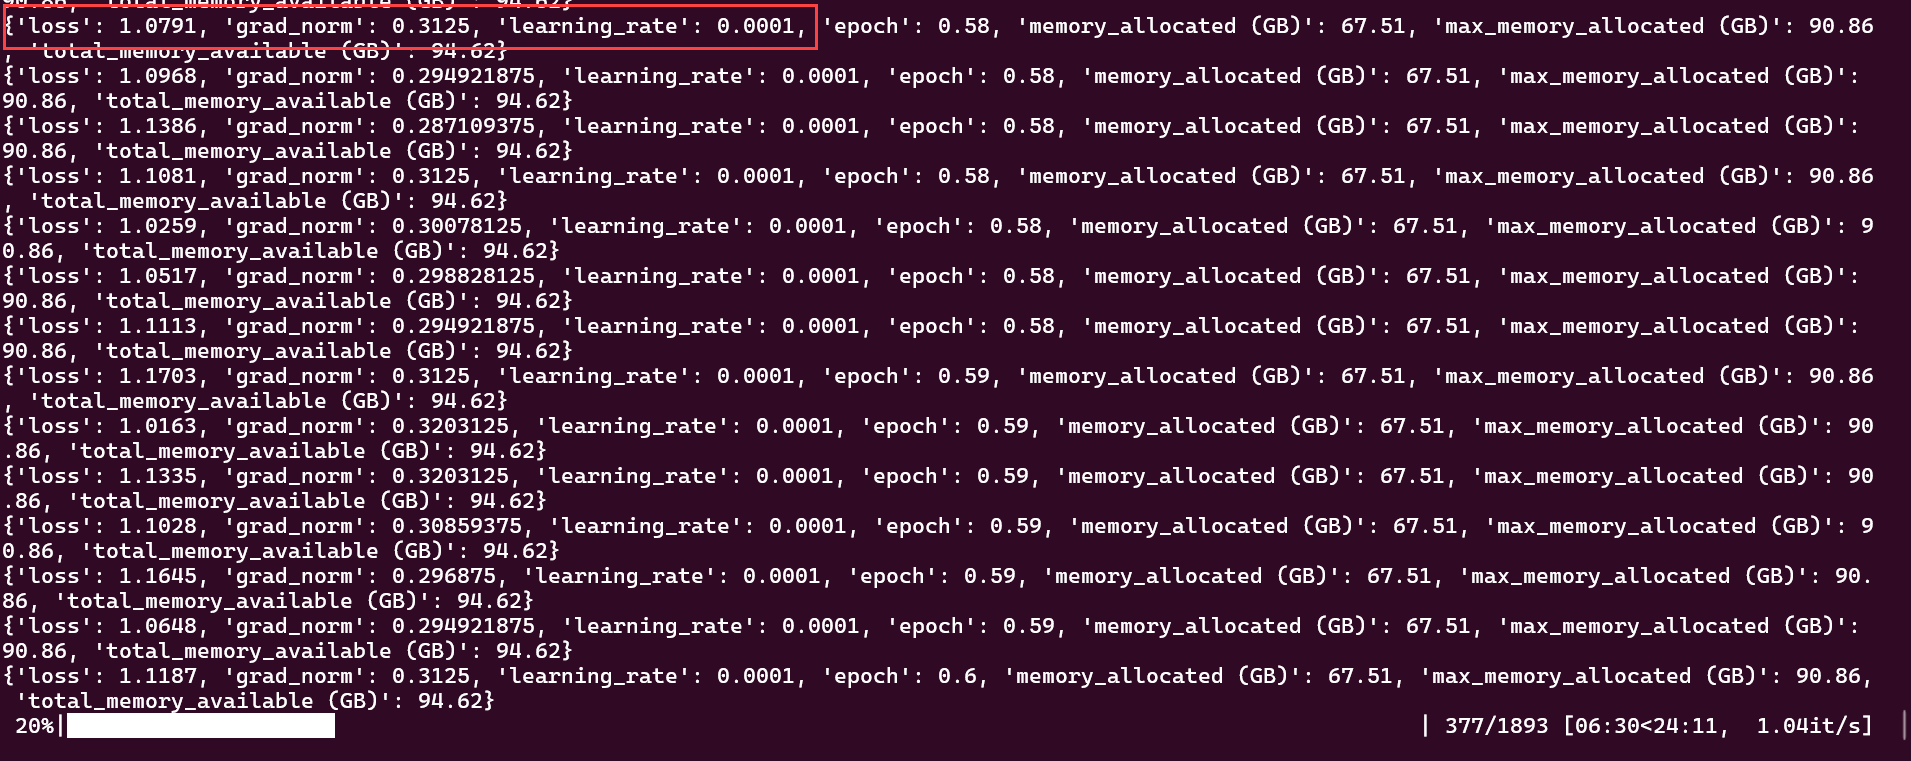
Observe how the rate of loss decreases over time during model fine-tuning.
At roughly 20% completion, loss shows: 1.0791.

Rate of loss at 20% completion
While at roughly 80% completion, loss shows: 0.9827.

Rate of loss at 80% completion
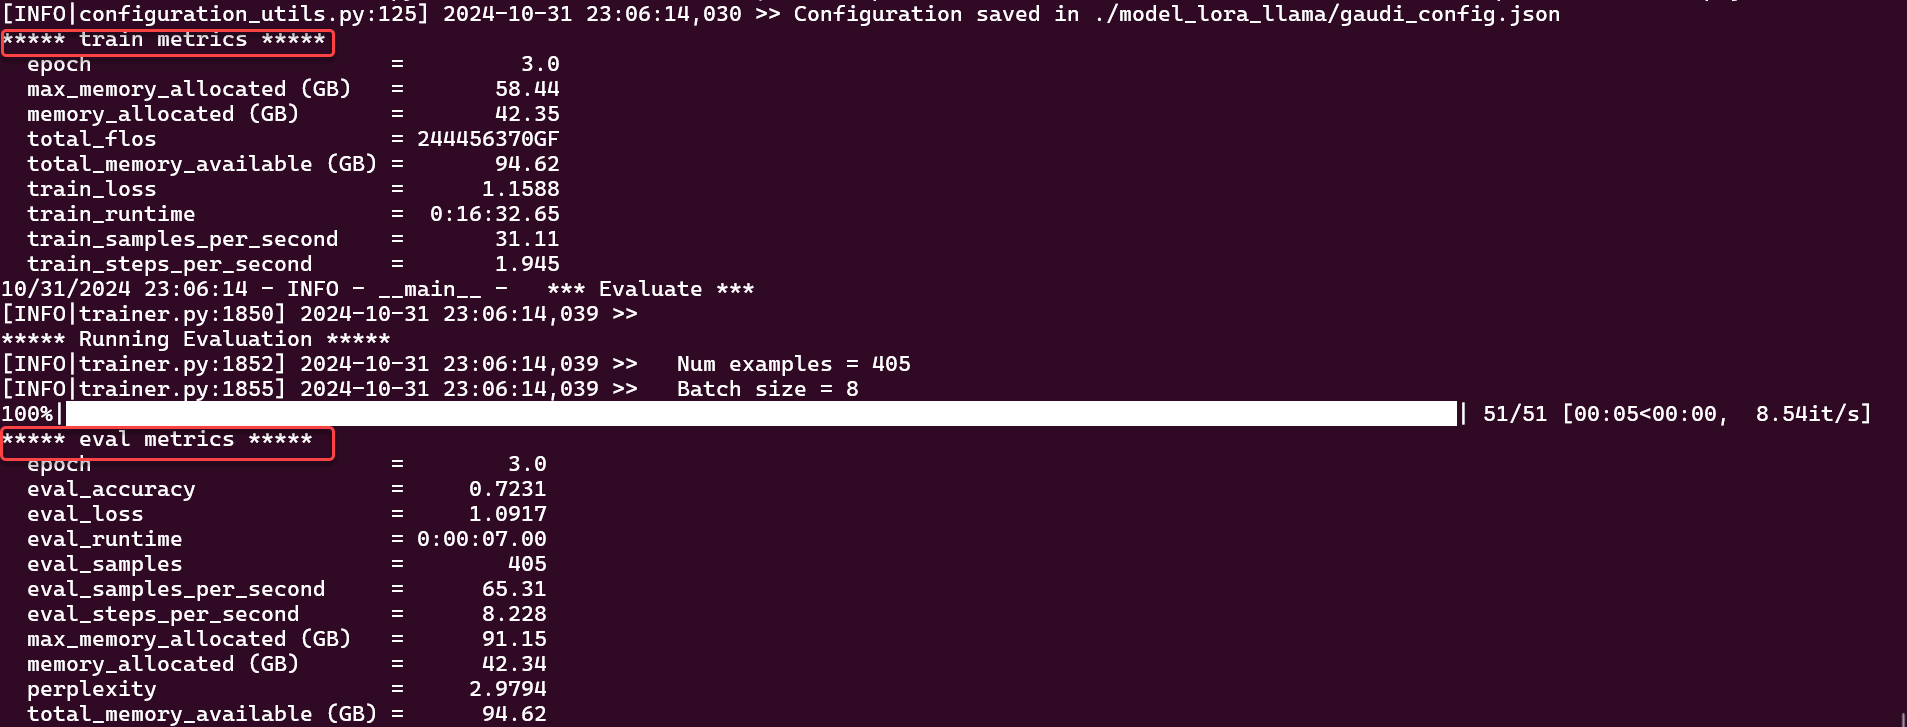
View the full results of fine-tuning below.

Example - Finetuning final results
View Results in JSON
While optional, this section shows how to view or save the output for training and evaluation.
Change directory to the output_dir, as defined previously in python3 run_lora_clm.py
cd model_lora_llama
Look for the updated weights in the output directory,
model_lora_llama.View All results.
cat all_results.jsonRun command to view only evaluation results.
cat eval_results.jsonYour evaluation output may differ.
"epoch": 3.0,
"eval_accuracy": 0.7230934426629573,
"eval_loss": 1.0917302370071411,
"eval_runtime": 7.0072,
"eval_samples": 405,
"eval_samples_per_second": 65.31,
"eval_steps_per_second": 8.228,
"max_memory_allocated (GB)": 91.15,
"memory_allocated (GB)": 42.34,
"perplexity": 2.979424726273657,
"total_memory_available (GB)": 94.62
Run command to view only training results.
cat eval_results.jsonYour training output may differ.
"epoch": 3.0,
"max_memory_allocated (GB)": 58.44,
"memory_allocated (GB)": 42.35,
"total_flos": 2.6248302923297587e+17,
"total_memory_available (GB)": 94.62,
"train_loss": 1.1588270471830313,
"train_runtime": 992.6524,
"train_samples_per_second": 31.11,
"train_steps_per_second": 1.945
Optional: You may use the
README.mdin the directorymodel_lora_llamaas a template to record test results.
Next steps
Learn more about Llama 3.2 models from Hugging Face.
Visit Optimum Habana Language Model Training to test more models.