Storage as a Service
Intel® Developer Cloud storage as a service (STaaS) simplifies model training and inference. Your project may require storing large amounts of unstructured data to improve model accuracy. Our storage solutions address:
Scalability
Accessibility
Latency
Throughput
Tip
The current offering only includes file-system storage.
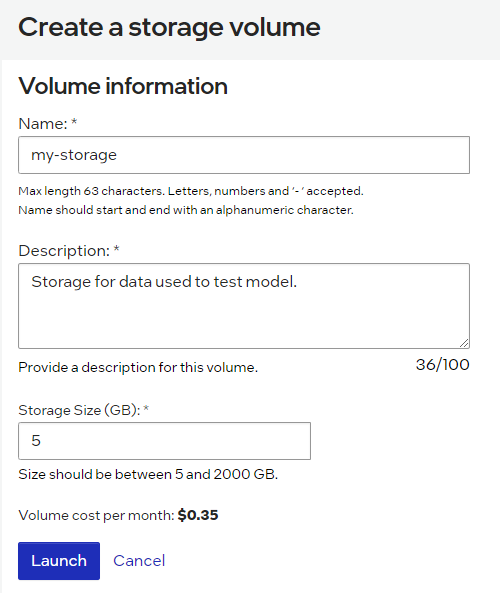
Create volume
In the console, at left, select Storage. The Storage Console appears.
Click Create volume.
Enter data in the following fields:
Name
Description
Storage size
Storage - Create volume
Note
Follow onscreen instructions to meet requirements.
After data entry is accepted, click Launch.
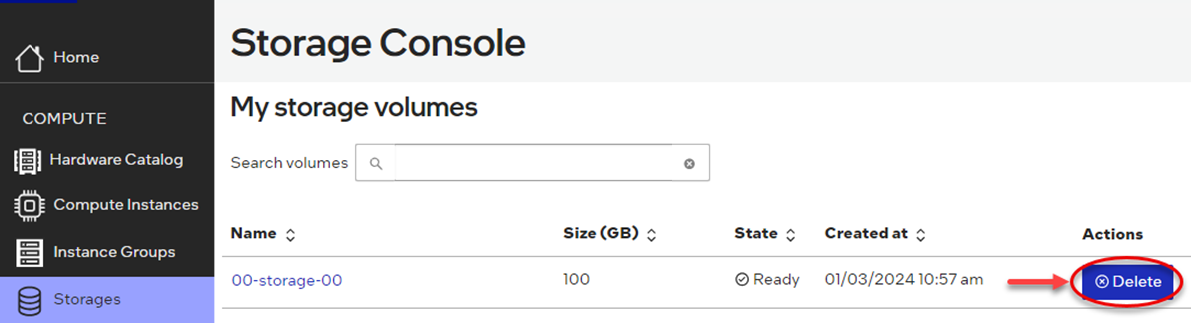
Delete volume
In the console, at left, select Storage.
In the Actions column, select Delete.
Storage - Delete volume
A dialog box requests confirmation.
Select Delete to proceed, or select Cancel to abort.
Mount volume
Select Storage in the left-side menu.
Click the name of your storage volume to show details.
Select How to mount.
Choose between single instance and instance group.

Storage - Mount volume
Note
You must have an instance available from which you can connect to the storage volume.
Click the Instance drop-downn menu.
Your instance should appear. Return to Manage Instance if you need to create a new instance.
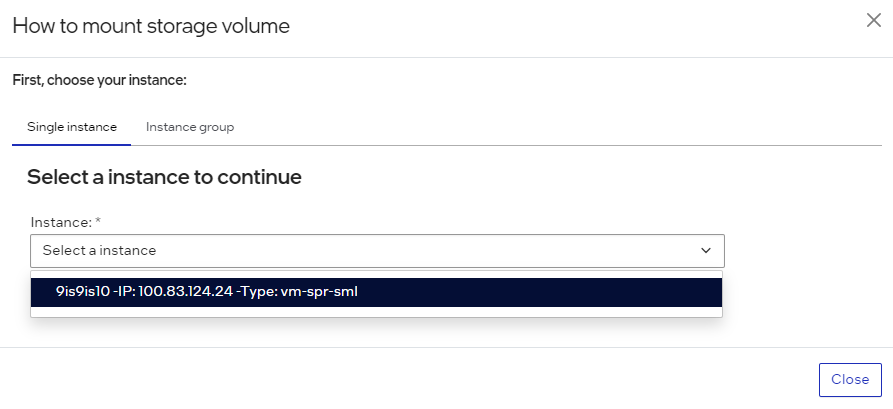
Select an instance
Choose Mount your volume.
Make sure to launch an instance from which you will mount a volume.
Follow the onscreen instructions to mount your volume.
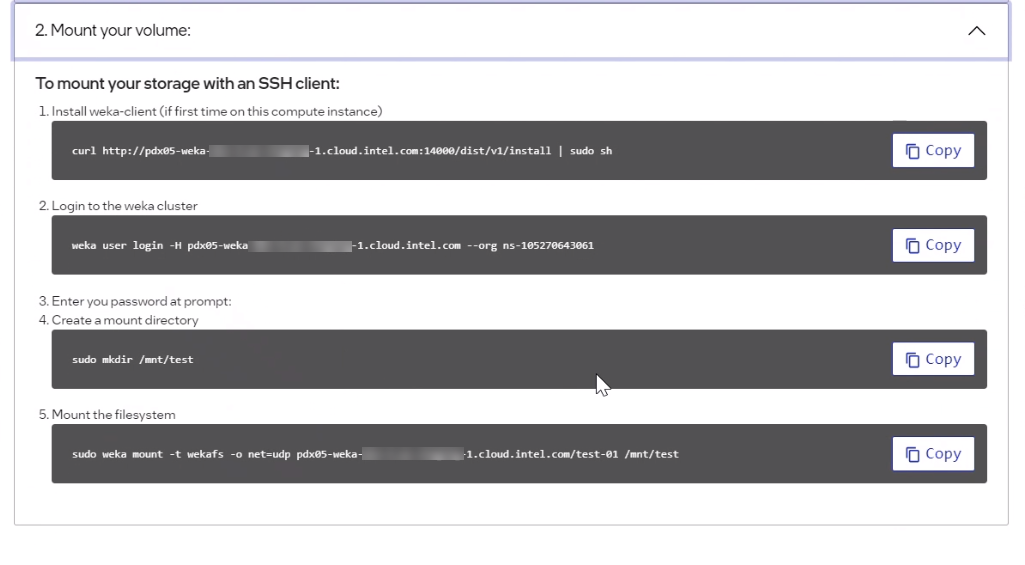
How to mount storage volume
Note
Commands shown are subject to change, based on the instance type.
After entering “login to the weka cluster”, you're instructed to’ “Enter your password at prompt”.
In the tab, click Generate password.
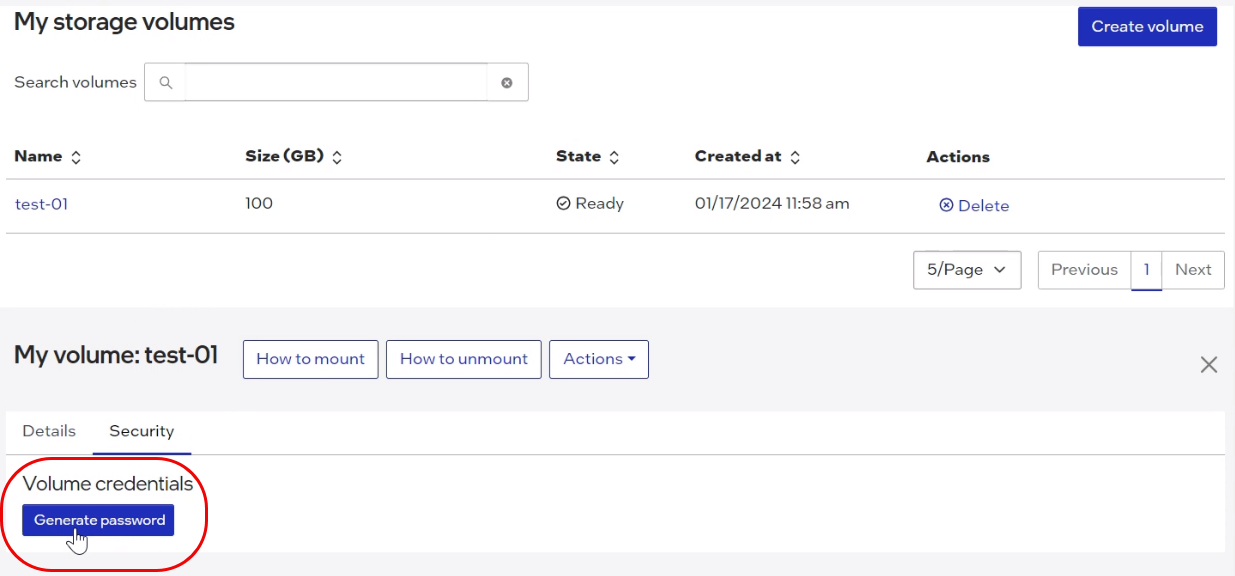
How to mount storage volume
In the pop-out dialog, click the copy button beside Password.
Paste that password into your Terminal instance.
Note
On most systems, use right-click, or CTRL+V, to paste the password. Once pasted, the password will not appear.
Press <Enter> to login.
Allow any downloads to complete as applicable.
Your Terminal output should show Mount completed successfully, as below.

Mount completed successfully
Verify Storage
Assure that you’re logged into your instance. Next, you can view mount points and perform basic file I/O operation.
View filesystem mount points:
df -h
To view more details, like Type and Size, try:
df -aTh
Change directory into the storage volume.
cd /mnt/test
Suppose you want to download a sample dataset from the UC Irvine Machine Learning Repository In this example, we download Online Retail dataset as a CSV file.
sudo curl -o data_online_retail.csv https://archive.ics.uci.edu/dataset/352/online+retail
FAQ
Question |
Answer |
|---|---|
Can I share file-system data across multiple instances? |
Yes. You can mount the same storage on multiple instances to share the data. |
Do you recommend bare metal or virtual machine storage for specific use cases? |
Mounting on bare metal will be slightly faster. Note: Mounting on a Guadi2 instance requires different mount commands. |
Is there a limit (e.g., quota) to the number or the size of storage volumes? |
Yes. The number of instances available varies across account type and processor type. Generally, the number of instances available increases from Standard to Enterprise accounts. If you exceed the quota, please contact Support. Enterprise users, please contact your representative. |